
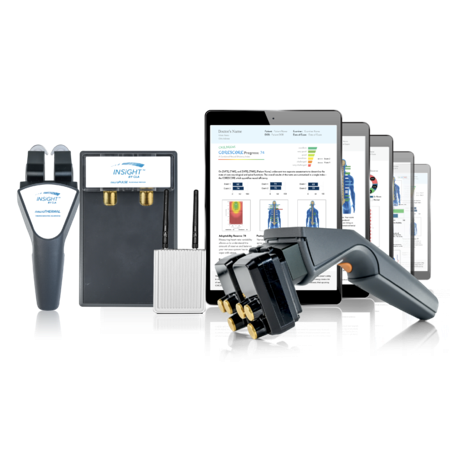

Synapse is a cloud-based application that was designed to perform on an iPad or via web browser. It is an evolution of previous INSiGHT scanning systems as it accesses the power of using an iPad and offers offline scanning at screening events. Intuitive reporting, based on the patient’s own scan data are generated with over 20 different combinations including the ground-breaking Children’s CORESCORE which compliments the Adult CORESCORE. Synapse will work with or without an internet connection. Patient data resides in a database on our cloud server and on the INSiGHT Bridge, an engineered micro- computer designed specifically for INSiGHT scanning.
Step 1: Using your Doctor Portal

Introduction
A separate Doctor’s Portal gives each CLA client the ability to launch browser-based scanning, manage their office and subscription information and monitor scanning statistics. There are multiple settings that can be configured to customize your Synapse scanning experience.
Go to:
Managing Practice Settings
There are multiple settings you can configure to customize your Synapse scanning experience:
- Update your Practice name
- Add or change your Practice gif
- Add or change your Practice location information
- Add or change your Practice Examiners
- Update membership subscription billing information
You’ll want to make sure your practice information is always up-to-date so your list in the global INSiGHT Directory is accurate. Visit www.insightchiros.com to view your online listing!
Features of Settings: Adding practice locations and examiners
To add a new practice location or examiner, simply click the + icon to be directed to the entry page. Make sure you assign new Examiners with the right permissions to permit and / or restrict access to patient findings.
Access Training
Want to learn more about Synapse? Click on the Book icon from the navigation bar on the left hand side of the Doctor Portal to access the Synapse Training Resources page. From here, you can access great info to learn more about INSiGHT Scanning with Synapse
Use Synapse on Web Browser
Although Synapse performs best on an iPad, you can still access the app from a Web Browser. Administrative activities, conduct scans and even scan interpretation work on a Web Browser once the App is launched. To access the App from a Web Browser, select ‘Launch App’ from the navigation bar on the left hand side of the Doctor Portal.
Helpful Links:
Step 2: Get Familiar with the Home Page

Once you login to Synapse, you will be taken to the homescreen where you can:
- Check the online status of your Bridge
- View our Scanning Essentials FAQ
- Access your patients
- Start an exam
- Configure your settings
- Perform a quick scan, and
- Review your practice stats
1. Scanning Essentials FAQ
Scanning essentials FAQ is a shortcut to review information like: preparing for scans, performing scans, types of scan views, and basic interpretation guidelines. You can access instant answers using the Interpretation and Reporting Tutorials.
2. Bread Crumbs
Simply swipe left on the home screen and practice stats are available showing types of scans, average scores and their usage within the practice.
3. Starting a Scan
There are 2 ways to begin a scan.
Use the Start an exam button or New Exam icon
4. Quick Scan
Quick scans are a great way to perform a tableside scan you don’t need to save or to use at screenings.
5. Bridge Status
Check the online status of your bridge. In the top left corner is a blue check mark telling you your bridge is online.
6. ICONs
The footer of the homescreen has 5 icons for quick shortcuts including home, patients, new exam, help and settings.
- The Patients icon leads you to where all patients and their scan files can be accessed.
- The New Exam icon is a quick way to initiate an exam .
- The Help icon opens up the Scanning Essentials library
- The Settings icon is where you can Manage INSiGHT Bridge and practice settings, create scan protocols and scan view generator templates, check on the status of your instruments or calibrate your neuroTHERMAL.
Step 3. Exploring Reporting and Scan View Options
1. Reports Overview
- Reports are based on Exams. Exams are a combination of scan views that are completed within a 7 day window.
- The most comprehensive report is the CORESCORE which is available in both Adults and Children’s formats.
- The CORESCORE It is based on scan data from the neuroCORE, neuroPULSE and neuroTHERMAL.
- There are 4 unique CORESCORE reports which are generated in sequence:
- Initial, Progress, Comparative and Continuation.
- If less than three instruments are used in an exam, a Dual report combines any two instrument’s scan views
- A single instrument report is also available
2. Scan View Overview:
Each scan you complete gets saved and organized by date in the patient file under Scan Views.
The Synapse Scan View Generator allows you to customize your reporting. Effortlessly build any number of Scan View Generator Templates and access and generate them directly from the patient file.
Step 4: Get familiar with printing and paperless options for reporting
1. Printing Overview
By introducing an iPad into scanning, we opened up a new world when it comes to sharing scans. The days of being forced to print pages and pages of scans and burn through endless ink is over.
- Introduce AppleTV’s into your report of findings rooms so you can AirPlay reports and scan views directly to the TV.
- Our CORESCORE reports are interactive, allowing you to click on the scan view thumbnails for additional reporting options, this feature makes report of findings particularly engaging.
- Pull up a scan view and mark it up with an Apple pen in iBooks to highlight areas of interest or concern
- Sharing scans paperlessly has never been easier. You can email text, or airplay scans directly to the patient sitting in front of you from your iPad.

2. Printing on Paper
Still like printing to paper? No problem. You can print directly to your printer from your iPad! If you want to add some pizazz to your patient education, check out our report of findings and progress folders from INSiGHT Media.